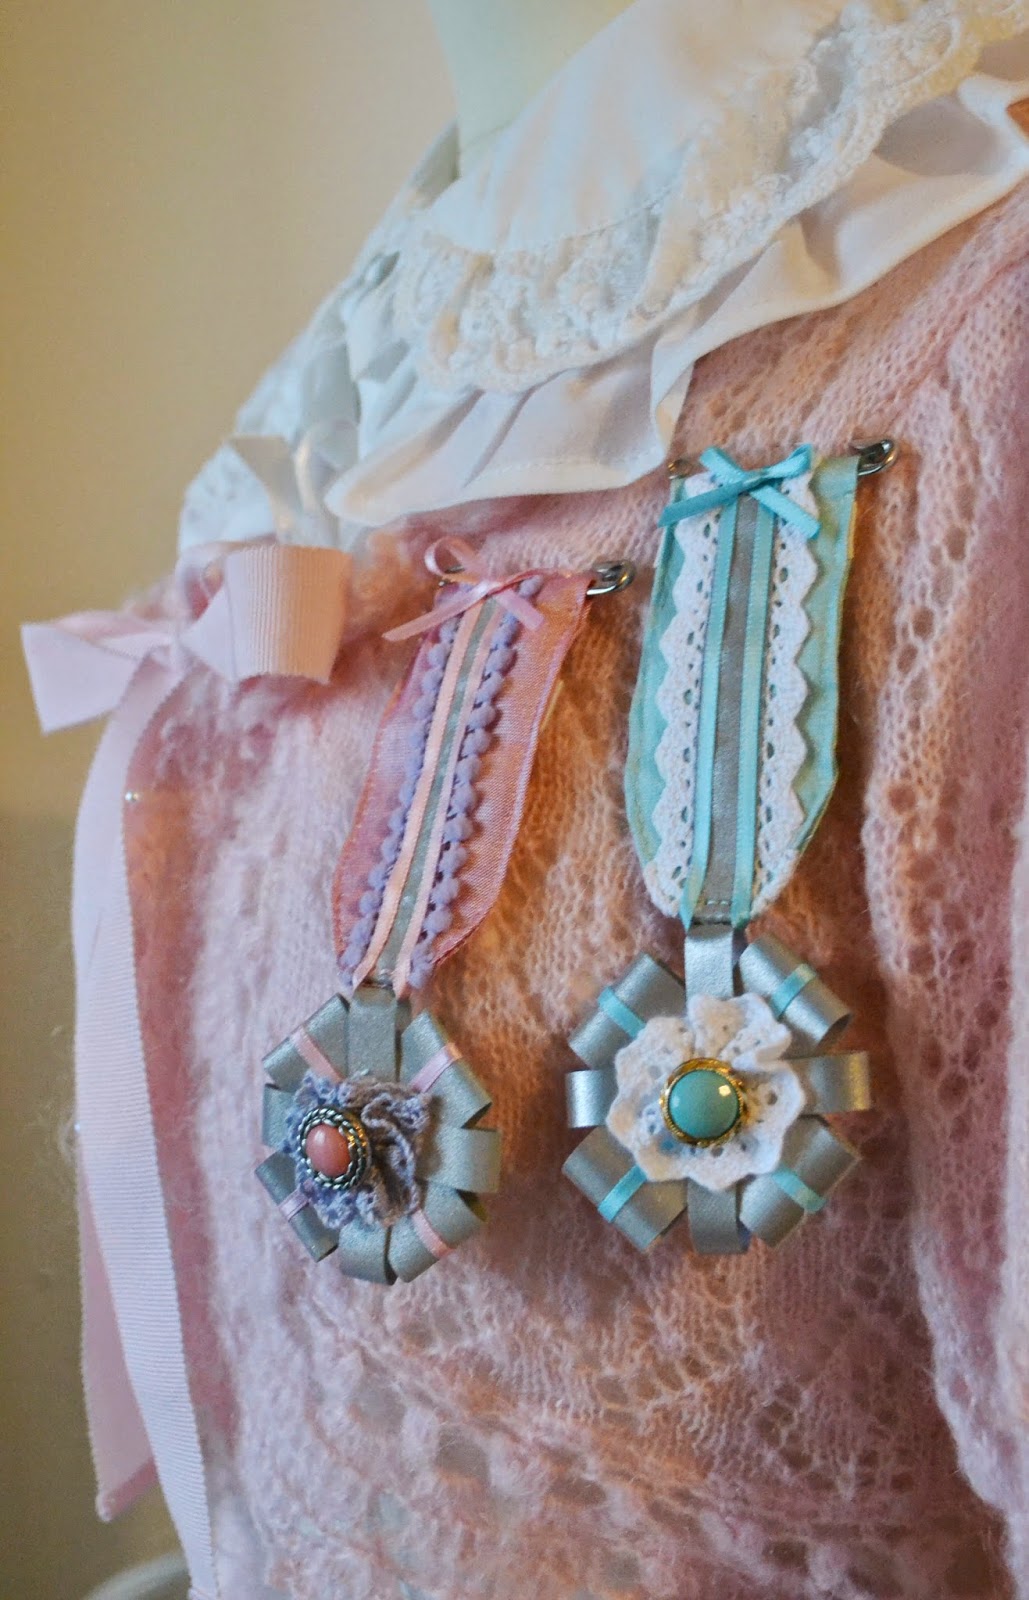
Tein suomalaisen lolita foorumin Enfantterriblen joulukalenteriin pienen tutoriaalin Cloudberry Ladyn heijastin kunniamerkeistä. Vaikka kyseinen tuote löytyy myös meiltä myynnistä halusin antaa myös askartelusta kiinnostuneille mahdollisuuden tehdä itse oman heijastimensa!
Me suomalaiset kyllä aika hyvin muistamme heijastimia käyttää, mutta joskus kaupunkialueen katulamppujen loisteessa tekisi mieli jättää se heijastin kotiin kun eihän se sovi edes asuun. ;) Tällä tutoriaalilla voit tehdä todella loli sopivan heijastimen, joka mätsää täydellisesti omaan talvitakkiisi! Tutoriaali löytyy kalenterin luukusta 8. ja mikäli askartelu ei ole sinun juttusi voit ostaa omasi Storenvystämme
Hello!
I wanted to share a tutorial for our reflector rosettes!
This kind of reflector rosettes are also available at our Storenvy but we didn't want to keep the instructions for making these a secret! We want to give every lolita an opportunity to make one for themselves!
It's important to wear a reflector during the dark time of the year and we know how annoying it is to try to find one that doesn't completely ruin your outfit. Well this one doesn't, in fact it can make the outfit even better! :)
So lets get started!
Materials:
Piece of fabric
40cm of reflector ribbon (width: 2cm)
50cm of thin satin ribbon
30cm of lace or other decorative ribbon
4,5cm long safety pin
1 pretty button
You will also need scissors, needle, thread, glue and a sewing machine.
Working instructions:
Ribbon part:
1. Cut a 18 x 6cm square piece from the fabric.
2. Cut two pieces of 10cm from the lace and sew them next to each other on the center of the fabric.
3. Cut a 10cm piece from the reflector ribbon and stitch it on top of the lace.
4. Fold the fabric and cut triangles out of the corners. Iron seam allowances (1cm) of the long sides to the back side of the fabric.
5.Fold the fabric's back side on top and stitch the head of the ribbon together, leave the sides open!
6. Turn the fabric and make sure that both sides are neatly on top of each other. Put the safety pin trough the top edge and sew the long sides neatly. I like to start next to the safety pin and stitch along the edges.
Preparing the rosette:
1. Cut three 10cm pieces from the reflector ribbon. Cut one of them half vertically.
2. Glue pieces of the satin ribbon on the centers of the wider reflector ribbons.
3. Glue one of the wider ribbons first to circle and then glue it to it self from the center.
4.Glue the other wider ribbon across the first one.
5.Glue the thinner ribbons crossing the wider ones.
6. Sew by hand trough the whole thing, the glue might not be enough to hold it together. If you don't like using glue you can just sew the rosette together.
7. Gather a 10cm piece of the lace to a circle and sew it on the center of the rosette.
8. Sew a button on top.
Joining the pieces:
1. Sew the ribbon you made earlier and the rosette together by hand. Sew the rosette from one of the thinner loops.
2.Put the thin satin ribbon trough the loop and glue it on top of the stitching of the reflector on the ribbon part. Burn the raw edges.
3.Make a little bow from the excess satin ribbon and glue it on the top of the ribbon part.
Done!
Sorry about the poor translation! Hope you can manage and don't hesitate to ask if something is unclear!
Are you going to make one? I would love to see your creations! <3


Ei kommentteja:
Lähetä kommentti